How embroidered patches are made, step by step
From artwork to finished patch: how designs are digitized, stitched on twill, cut, backed and checked — and what each step means for your order.
· 5 min read
Key takeaways
- An embroidered patch is made in six steps: artwork review, digitizing (turning the design into a stitch file), machine embroidery on twill, cutting and bordering, adding the backing, and a final quality check.
- Digitizing decides how the patch looks: which stitch type fills each area, which direction the threads run and how dense they are. Good digitizing matters more than the machine.
- Patches are stitched with real thread on a twill base. Each thread color is a separate needle, which is why simple designs with up to 9 solid colors stitch most cleanly.
- Before bulk production we stitch one real sample and send you photos of it. Bulk production starts only after you approve it.
An embroidered patch is a small piece of twill fabric covered in thread by an industrial embroidery machine, then cut to shape, finished with a border and given a backing such as iron-on or velcro. The process looks simple, but each step changes how your patch looks and lasts. Here is what happens between uploading your artwork and receiving your patches.
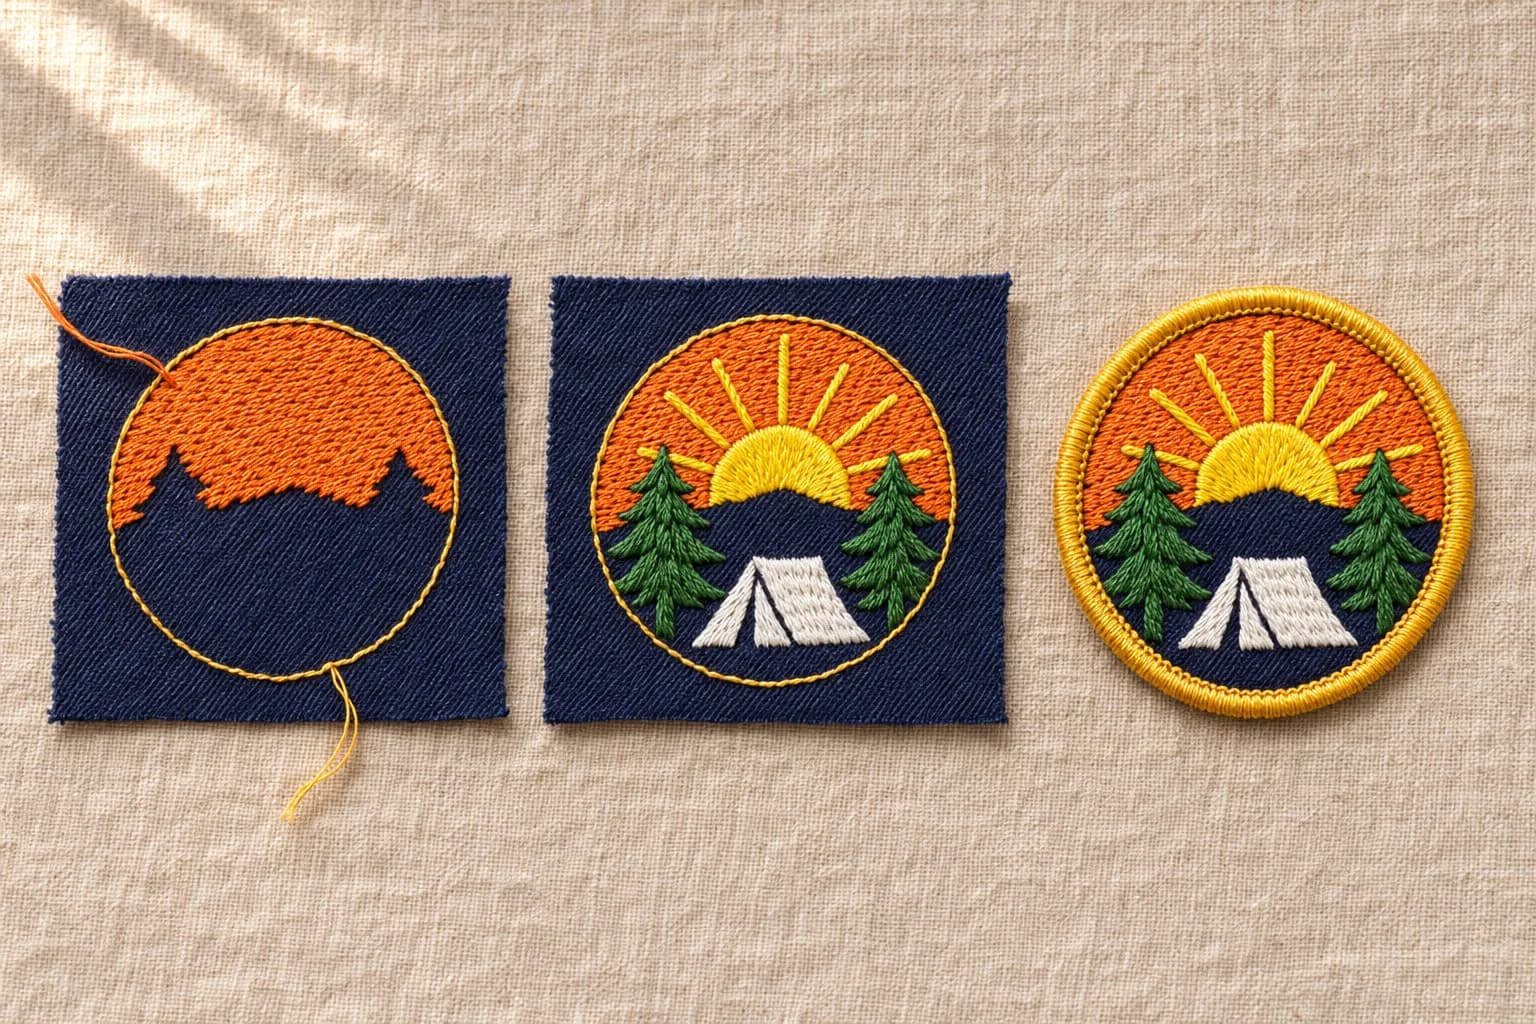
Step 1: Artwork review and color matching
Everything starts with your design. It is checked for details that thread can't reproduce and matched to thread colors. Embroidery uses solid thread colors, so smooth color fades become a few solid shades, and very thin lines are thickened — lines should be at least about 1 mm wide to stitch cleanly. Online orders include up to 9 thread colors; see our artwork guidelines for the files and details that work best.
Step 2: Digitizing — turning art into stitches
An embroidery machine can't read a picture. A technician called a digitizer redraws your design as a stitch file: a precise map that tells the machine where every stitch goes, in which order and in which color. This is the most skilled step in the whole process. The digitizer chooses a stitch type for each area, sets the angle of the stitches so light catches them nicely, and adds a hidden base layer (underlay) that keeps the top stitches smooth and raised.
| Stitch type | What it looks like | Used for |
|---|---|---|
| Satin stitch | Long, shiny parallel stitches | Lettering, outlines, narrow shapes, hot-cut borders |
| Fill (tatami) stitch | Short stitches in rows, like a woven texture | Large areas and backgrounds |
| Running stitch | A single thin line | Fine details and small accents |
Step 3: Choosing the base and the embroidery coverage
Patches are stitched on twill, a sturdy woven fabric that holds dense stitching without puckering. How much of that twill is covered with thread is called embroidery coverage, and it affects both the look and the price.
| Coverage | How it looks | Good for |
|---|---|---|
| 50% | The twill background shows around the design | Simple logos and line art with a colored background |
| 75% | Most of the surface is stitched | A balance of detail and price for most designs |
| 100% | The whole patch is covered in thread | Detailed designs and the richest, most textured look |
Step 4: Machine embroidery
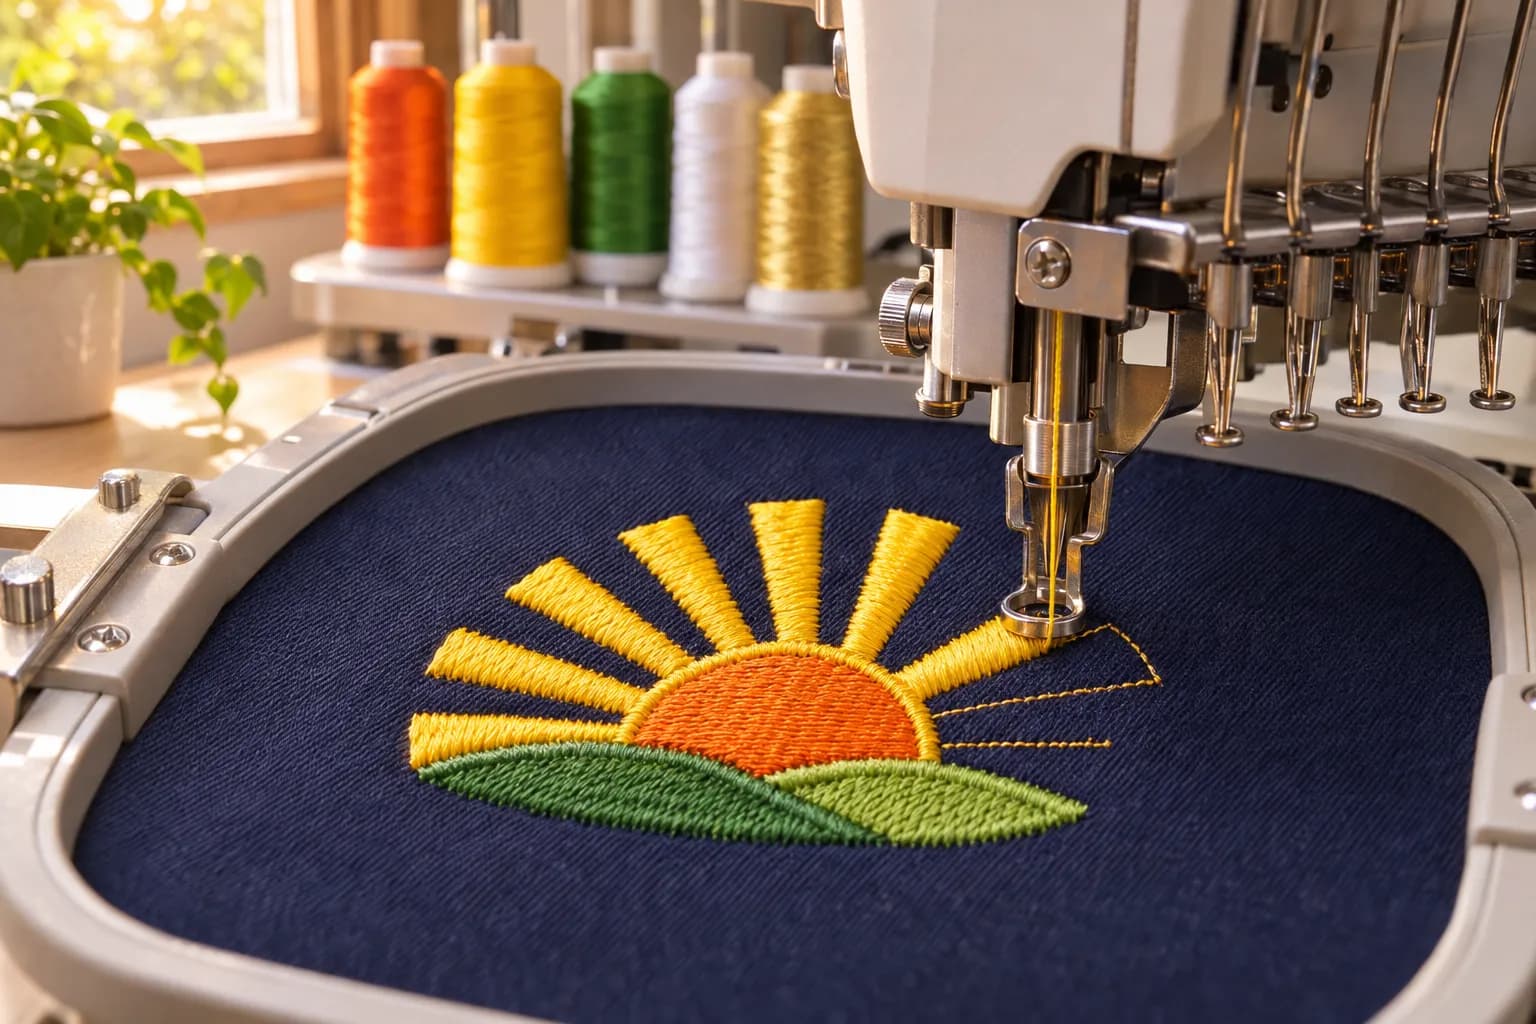
The twill is stretched tight in a frame (a hoop) and loaded into a commercial embroidery machine. Machines used for patches have many heads, so the same design is stitched many times on one sheet at once, and each head has a row of needles — one per thread color. The machine follows the stitch file, switching needles automatically for each color. Lettering and outlines usually go last so they sit crisply on top.
Step 5: Cutting and adding the border
Once stitching is done, the sheet is cut into individual patches and each one gets its edge. Regular shapes such as circles, squares, rectangles and shields usually get a merrowed border, a thick rim of thread wrapped around the edge. Custom shapes are cut with heat, which seals the fabric, and are framed by a satin-stitch outline. Our guide to merrowed vs. hot-cut borders explains the difference in detail.
Step 6: Adding the backing
The backing decides how the patch is attached:
- Iron-on (heat seal): a layer of heat-activated adhesive is pressed onto the back, so you can apply the patch with a household iron or a heat press. See custom iron-on patches.
- Velcro (hook and loop): the hook side is sewn to the patch and you get the matching loop side to sew onto your garment or bag. See custom velcro patches.
- Sew-on: no backing at all — the cleanest option if the patch will be sewn on.
Step 7: Quality check and sample approval
Each patch is trimmed of loose threads and checked against the approved design: colors, spelling, shape and size. Because embroidery is a physical process, small natural variations — a slightly different shade of thread or about ±3 mm in size — are normal. To make sure the result is what you expect, we stitch one real sample first and email you photos of it. You can ask for changes, and bulk production starts only after you approve the sample.
- You upload your artwork and choose size, shape, backing, border and quantity — the price appears instantly.
- After payment, we digitize the design and stitch a first sample, then email you photos of it.
- You approve the sample or ask for changes (up to 3 revisions are free).
- We produce your full order and ship it to your door with tracking.
Ready to see what your design costs? Upload it in our price calculator — you get an exact price and delivery dates in under a minute, and you approve a real stitched sample before bulk production.
Frequently asked questions
How long does it take to make embroidered patches?
Stitching itself is fast, but digitizing, sampling and approval take time. We email photos of your stitched sample in about 5 business days, and the delivery dates shown in our price calculator include production and shipping.
What is digitizing in embroidery?
Digitizing is converting artwork into a stitch file that tells the embroidery machine where each stitch goes, in which color and direction. It has the biggest influence on how sharp and smooth a patch looks.
Why can't embroidery show gradients or photos?
Each area is stitched with one solid thread color, so smooth color fades and photographic detail can't be reproduced exactly. They are simplified into a few solid colors, and the sample photos show the result before bulk production.
What fabric are embroidered patches made of?
Most embroidered patches are stitched on twill, a strong woven fabric that holds dense stitching. With 100% coverage the twill is completely hidden under thread.
Are embroidered patches made by hand?
The stitching is done by industrial embroidery machines, but the digitizing, setup, trimming, bordering and inspection are done by people, which is why small variations between patches are normal.
See your price in seconds
Start designing